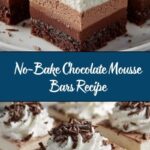
If you are a chocolate lover looking for a dessert that is both luscious and effortless, then this No-Bake Chocolate Mousse Bars Recipe is your new best friend. Imagine velvety, airy chocolate mousse layered over a crisp cookie crust and topped with a smooth chocolate ganache finish—all waiting in your fridge without turning on your oven. This dessert strikes the perfect balance between rich and refreshing, making it an ideal treat for any occasion. From the first bite to the last, these bars bring a delightful chocolate experience that’s sure to impress and satisfy.
Ingredients You’ll Need
The beauty of this recipe lies in its simplicity and how each ingredient plays an essential role. From the buttery crust that holds everything together to the fluffy mousse that melts in your mouth, every component adds a unique texture and flavor dimension.
- Chocolate cookie crumbs: These provide a sturdy, chocolaty base that contrasts wonderfully with the creamy topping.
- Melted butter: Acts as a binder for the crust, adding richness and a delicate crumbly texture.
- Heavy cream: Key to achieving that light, airy mousse texture and the luscious chocolate layer.
- Semisweet chocolate chips (melted): Gives the mousse its rich chocolate flavor with just the right amount of sweetness.
- Powdered sugar: Sweetens the mousse softly without any graininess.
- Vanilla extract: Enhances the chocolate with warm aromatic undertones.
- Semisweet chocolate chips (for ganache): Creates the smooth and glossy chocolate layer topping the mousse.
- Whipped cream: Adds a light, decorative finish and balances the intensity of the chocolate.
- Chocolate shavings or cocoa powder (optional): Great for adding an elegant final touch and extra chocolate punch.
How to Make No-Bake Chocolate Mousse Bars Recipe
Step 1: Prepare the Crust
Start by mixing the chocolate cookie crumbs with melted butter in a bowl until they’re well combined. This mixture forms the foundation of your bars, so press it firmly into the bottom of an 8×8-inch dish to create an even, compact crust. Pop it into the refrigerator to chill and set while you prepare the mousse filling.
Step 2: Make the Mousse
In a mixing bowl, beat together the heavy cream, melted semisweet chocolate chips, powdered sugar, and vanilla extract until the mixture thickens and becomes fluffy. This mixture is the star of the show—airy and intensely chocolatey, it provides a dreamy texture that pairs perfectly with the hearty crust. Spread this mousse evenly over your chilled crust and then refrigerate again to let it firm up before adding the next layer.
Step 3: Add the Chocolate Layer
Warm the heavy cream until it’s just hot to the touch but not boiling. Pour the warm cream over the semisweet chocolate chips and let it sit for a minute to soften the chips. Then stir gently until you achieve a smooth, glossy ganache. Carefully spread this chocolate layer over the mousse, creating the final decadent touch. Refrigerate the bars for at least 4 hours or until completely set to ensure the layers hold together beautifully.
Step 4: Garnish and Serve
Before slicing into bars, top with a dollop of whipped cream and sprinkle with chocolate shavings or a dusting of cocoa powder if you like. This adds a touch of elegance and an extra layer of flavor that’s sure to wow your friends and family.
How to Serve No-Bake Chocolate Mousse Bars Recipe

Garnishes
Whipped cream is an obvious winner for garnishing, lending a light contrast to the rich chocolate layers. Chocolate shavings add a sophisticated look, while a light sprinkle of cocoa powder offers a subtle bitterness that complements the sweetness. Fresh raspberries or mint leaves can also offer a refreshing pop of color and flavor.
Side Dishes
Serving these bars with a scoop of vanilla ice cream or a drizzle of raspberry sauce can elevate the dessert experience. A cup of strong coffee or rich hot chocolate pairs especially well with this decadent treat, balancing the mousse’s sweetness with warmth and depth.
Creative Ways to Present
If you want to impress your guests, try serving the No-Bake Chocolate Mousse Bars Recipe in individual glasses or ramekins layered with crushed cookies and mousse for a parfait-style presentation. Alternatively, slice into neat bars and arrange on a decorative platter with mint sprigs and fresh berries for a stunning display that invites everyone to dig in.
Make Ahead and Storage
Storing Leftovers
You can keep your mousse bars covered tightly in the refrigerator for up to 4 days. The flavors meld beautifully over time, so leftovers often taste even better the next day. Just make sure to keep them chilled to maintain their perfect texture.
Freezing
If you want to store these bars longer, wrapping them well and freezing for up to 2 months works great. To serve, thaw overnight in the refrigerator to retain their creamy consistency without any sogginess or melting.
Reheating
This dessert is best enjoyed cold, so reheating is not recommended. Instead, allow frozen bars to thaw fully in the fridge, then bring to room temperature if desired for the softest texture. The mousse and ganache layers will hold their creamy structure beautifully when served chilled.
FAQs
Can I use a different type of cookie for the crust?
Absolutely! While chocolate cookie crumbs provide the best chocolate kick, feel free to experiment with graham crackers or even crushed pretzels for a salty twist. Just keep in mind this will affect the flavor profile.
Can I make this recipe dairy-free?
Yes, substitute the heavy cream with coconut cream and use dairy-free chocolate chips. The texture might be slightly different, but it will still be deliciously creamy and rich.
What if I don’t have whipped cream for garnishing?
No worries! You can skip the whipped cream or replace it with a swirl of coconut cream or a dusting of powdered sugar. Fresh berries also make a wonderful decorative and tasty alternative.
How long does the mousse need to chill before serving?
To get the best texture, chill the bars for at least 4 hours. This allows the mousse and chocolate layers to set properly and makes slicing easier.
Can I double this recipe?
Yes, doubling is simple—just double all the ingredients and use a larger baking dish. Keep an eye on the layering to ensure everything sets evenly.
Final Thoughts
This No-Bake Chocolate Mousse Bars Recipe is truly a game-changer for anyone who loves easy yet indulgent desserts. It’s a perfect balance of creamy, crunchy, and chocolatey goodness that doesn’t require turning on the oven. I promise once you try these bars, they will become a staple for your dessert repertoire, ideal for impressing guests or just treating yourself to a little everyday luxury.
Print
No-Bake Chocolate Mousse Bars Recipe
- Prep Time: 15 minutes
- Cook Time: 0 minutes
- Total Time: 4 hours 15 minutes
- Yield: 12 servings
- Category: Dessert
- Method: No-Cook
- Cuisine: American
Description
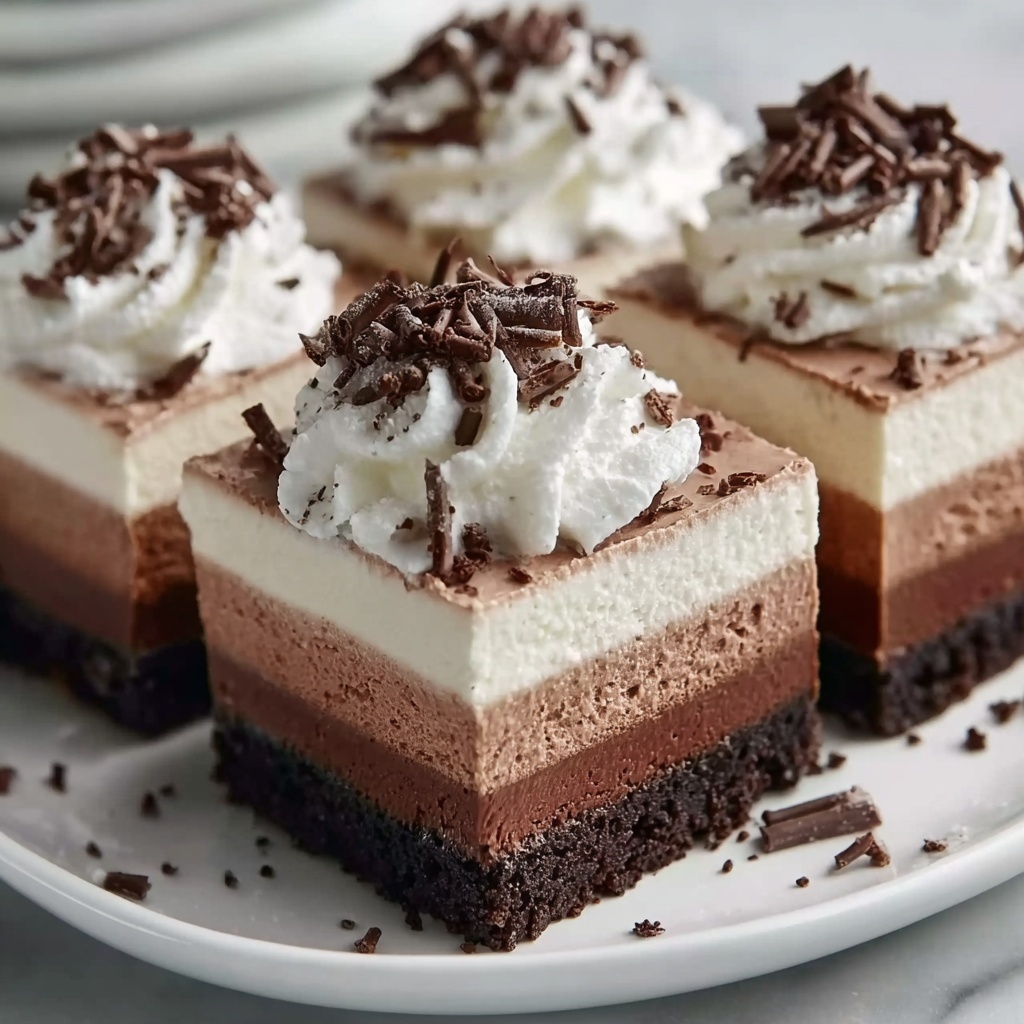
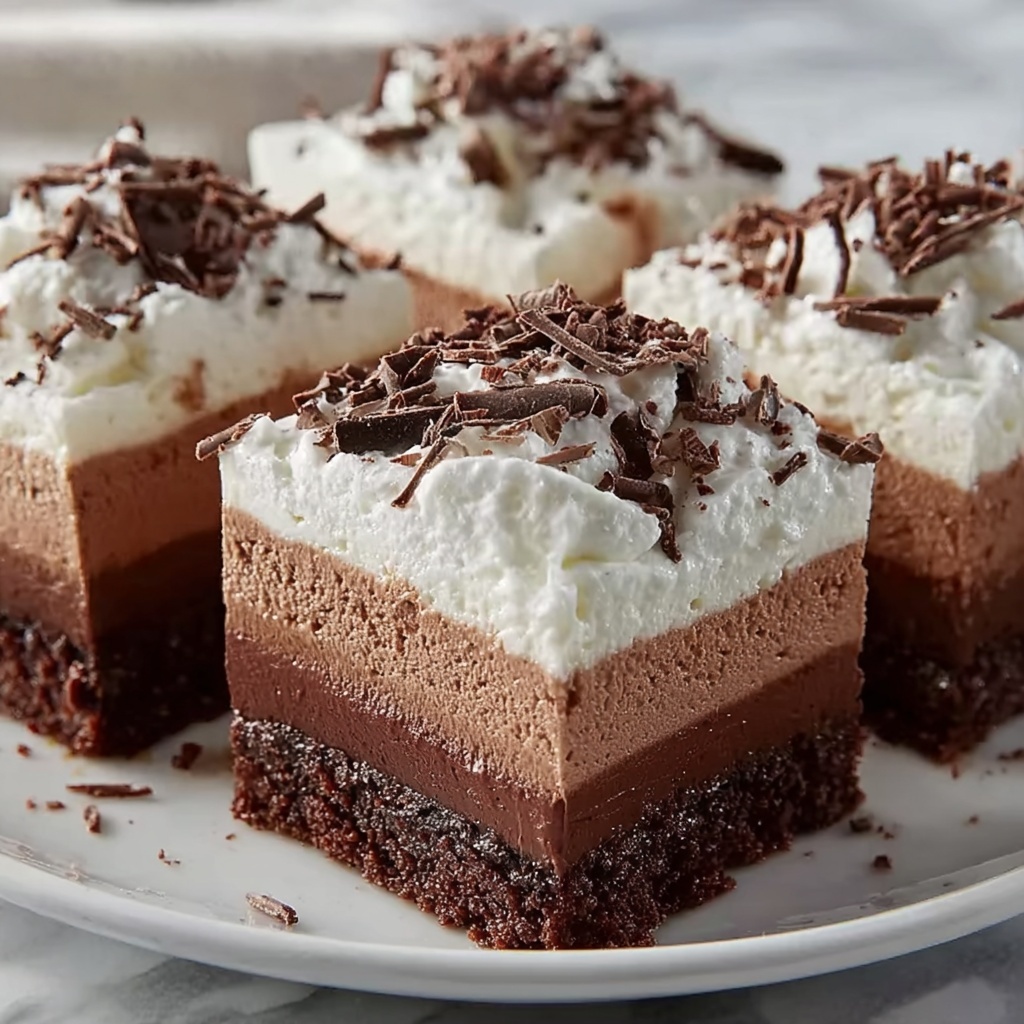
No-Bake Chocolate Mousse Bars are a decadent, creamy dessert featuring a crunchy chocolate cookie crust, a light and fluffy chocolate mousse layer, and a smooth chocolate ganache topping. Easy to prepare with no baking required, these bars are perfect for chocolate lovers looking for an elegant treat that sets in the refrigerator.
Ingredients
For the Crust
- 2 cups chocolate cookie crumbs
- ½ cup melted butter
For the Mousse Filling
- 1 ½ cups heavy cream
- 1 cup semisweet chocolate chips, melted
- ¼ cup powdered sugar
- 1 teaspoon vanilla extract
For the Chocolate Layer
- ¾ cup semisweet chocolate chips
- ½ cup heavy cream
For Garnish
- ½ cup whipped cream
- Chocolate shavings or cocoa powder (optional)
Instructions
- Prepare the Crust: In a medium bowl, combine the chocolate cookie crumbs and melted butter. Mix well until the crumbs are evenly coated with butter.
- Press Crust: Firmly press the mixture into the bottom of an 8×8-inch dish to form the crust layer. Place the dish in the refrigerator to chill while you prepare the mousse filling.
- Make the Mousse: In a large bowl, beat the heavy cream, melted semisweet chocolate chips, powdered sugar, and vanilla extract together until the mixture becomes fluffy and light, forming the mousse.
- Spread Mousse: Evenly spread the chocolate mousse over the chilled crust layer in the dish. Return to the refrigerator to set while you prepare the chocolate layer.
- Add the Chocolate Layer: Warm the heavy cream in a small saucepan until it is heated through but not boiling. Pour the warm cream over the semisweet chocolate chips in a bowl. Let sit for a minute to soften, then stir until the mixture is smooth and glossy.
- Spread Chocolate Layer: Spread the chocolate ganache evenly over the mousse layer in the dish.
- Chill to Set: Cover and refrigerate the bars for at least 4 hours, or until fully set and firm.
- Garnish and Serve: Before serving, top the bars with whipped cream and garnish with chocolate shavings or a sprinkle of cocoa powder if desired.
- Slice and Enjoy: Cut into bars and serve chilled for a rich, creamy dessert experience.
Notes
- Ensure the heavy cream for the chocolate layer is warm but not boiling to prevent seizing the chocolate when combining.
- You can substitute semisweet chocolate chips with dark or milk chocolate depending on your preference.
- Chilling the bars overnight will improve the texture and make slicing easier.
- Optionally, use gluten-free chocolate cookie crumbs to make the dessert gluten-free.
- Store the bars in the refrigerator and consume within 3 days for best freshness.