
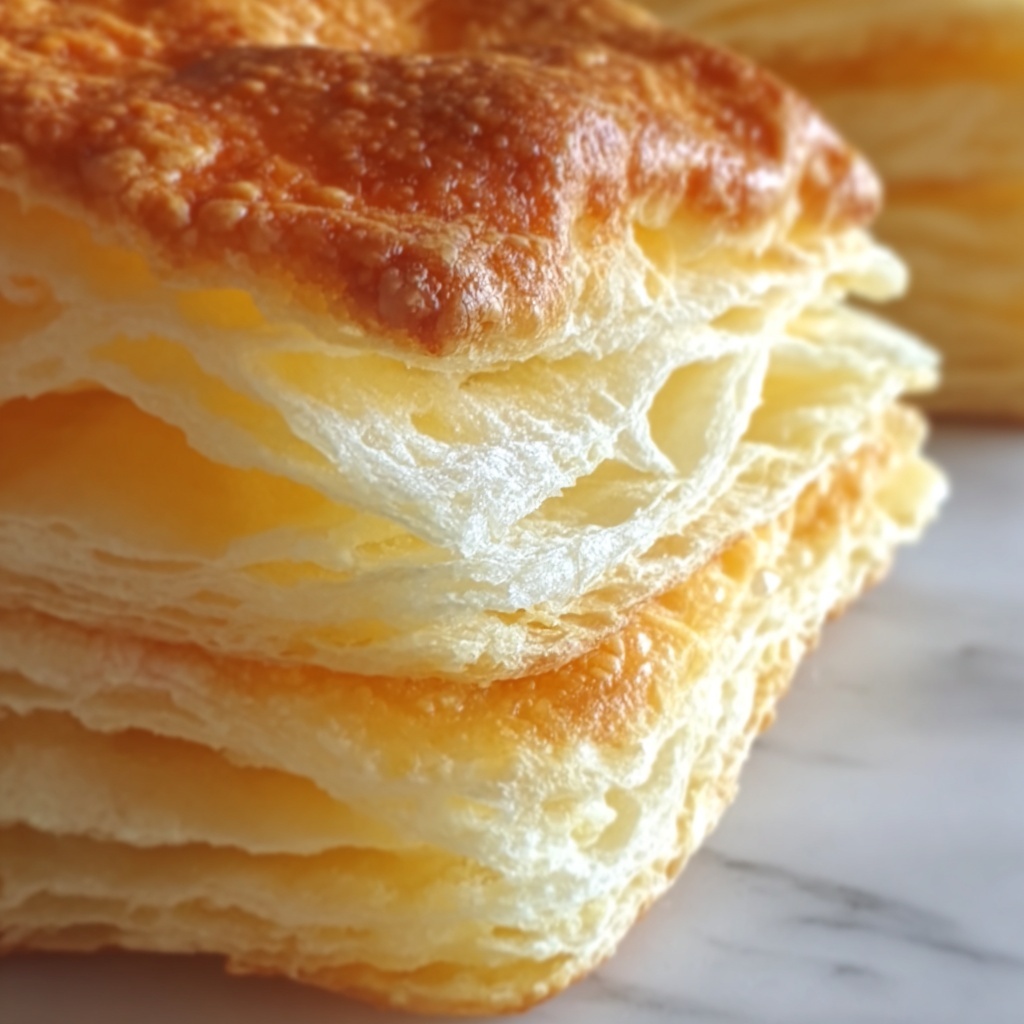
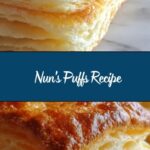
If you are craving a light, airy treat that feels like a warm hug from the inside, then this Nun’s Puffs Recipe is your new best friend. These golden, cloud-like puffs have a delicate, slightly sweet flavor with a perfect balance of crisp exterior and soft, tender interior. Whether you’re serving them for breakfast, afternoon tea, or a special dessert, these delightful bites bring comfort and charm to any table, making every bite a moment to savor.
Ingredients You’ll Need
Getting started with the Nun’s Puffs Recipe is a breeze, thanks to its simple yet thoughtfully chosen ingredients. Each one plays a key role in creating the perfect texture and flavor, from the rich butter to the binding eggs.
- Butter: Adds richness and helps create a tender, golden crust on each puff.
- Milk: Provides moisture and a slight creaminess that balances the dough’s texture.
- All-purpose flour: The structure-builder, essential for forming the dough ball that will puff up in the oven.
- Eggs: These are the magic ingredient that give Nun’s Puffs their airy, light quality and beautiful rise.
- Sugar (optional): Adds just a hint of sweetness and a touch of caramelization on top when sprinkled before baking.
- Sugar for sprinkling: Enhances the final presentation with a sparkling finish and extra sweetness.
- Honey for serving: Perfect for drizzling over the warm puffs to add natural sweetness and a lovely sticky texture.
- Whipped cream or fruit (optional): These fresh touches beautifully complement the puffs for a more indulgent treat.
How to Make Nun’s Puffs Recipe
Step 1: Preparing the Oven and Pan
Start by preheating your oven to 375°F (190°C). It’s important to grease your muffin pan thoroughly so the puffs won’t stick, helping them release easily with that perfect golden crust intact.
Step 2: Melting Butter and Heating Milk
Melt the butter gently in a saucepan over low heat. Once melted, add the milk and bring the mixture just to a low boil. This step ensures the fats and liquids blend smoothly, which is crucial for the dough’s texture.
Step 3: Making the Dough
Remove the pan from heat and add all the flour at once. Stir vigorously to combine; the mixture will come together into a dense ball. This quick stirring helps set the dough’s base for puffing up beautifully in the oven.
Step 4: Cooling the Dough
Let the dough cool for about 5 minutes so it’s warm but not hot. This cooling step allows you to incorporate the eggs without scrambling them and ensures a smooth batter.
Step 5: Incorporating the Eggs
Add the eggs one at a time, mixing thoroughly after each addition. This careful blending is where the dough transforms—each egg brings air and lightness, helping the puffs achieve their signature rise and fluffiness.
Step 6: Filling the Muffin Cups
Spoon the dough evenly into your prepared muffin pan cups. Sprinkle a little sugar on top if you like the added sweetness and crisp sparkle. This simple step adds a lovely tactile contrast once baked.
Step 7: Baking the Puffs
Bake your little puffs for about 30 minutes until they are golden, puffed, and irresistible. The heat will create steam inside, causing the dough to inflate and develop that beautiful airy structure.
Step 8: Serving Warm
Serve your Nun’s Puffs warm, just out of the oven. Drizzle honey or add a dollop of whipped cream and fresh fruit for extra indulgence. The warmth brings out their delicate flavor and melt-in-your-mouth texture.
How to Serve Nun’s Puffs Recipe

Garnishes
Creating the perfect garnish can elevate your Nun’s Puffs to a show-stopping treat. A simple dusting of powdered sugar or a drizzle of golden honey adds sweetness and visual appeal, while fresh berries or a spoonful of whipped cream introduce vibrant color and freshness.
Side Dishes
These puffs pair wonderfully with light, fresh sides such as a crisp green salad or a bowl of mixed seasonal fruit. For breakfast or brunch, consider serving alongside scrambled eggs or smoked salmon to balance the sweetness with savory notes.
Creative Ways to Present
Try stacking Nun’s Puffs in a high tower for a stunning centerpiece or place each puff in a pretty dish topped with fruit compote. You can even serve them with a little pot of honey or flavored syrups on the side for dipping – guests will love the interactive experience!
Make Ahead and Storage
Storing Leftovers
If you have any leftover Nun’s Puffs, keep them in an airtight container at room temperature for up to 2 days. Their crispness will soften slightly, but they retain much of their charm and taste.
Freezing
You can freeze Nun’s Puffs before baking by placing the filled muffin pan in the freezer until set, then transferring the puffs to a freezer-safe bag. Bake from frozen, adding a few extra minutes to the baking time for fresh results.
Reheating
Reheat leftover puffs in a warm oven at 350°F for about 5-7 minutes to revive their golden crust and light interior. Avoid microwaving, as this can make them gummy instead of crisp and airy.
FAQs
What makes Nun’s Puffs so light and airy?
The secret lies in the eggs and the cooking method—they add moisture and structure, and when baked, the steam causes the puffs to rise dramatically, resulting in a fluffy, delicate texture.
Can I make Nun’s Puffs gluten-free?
Yes! Substitute the all-purpose flour with a gluten-free flour blend that is designed for baking to keep the texture light and the puffs puffed up beautifully.
Is sugar necessary in the recipe?
Sugar is optional but recommended. It adds a subtle sweetness and helps create a nice caramelized crust on top, enhancing both flavor and appearance.
Can Nun’s Puffs be made dairy-free?
Absolutely! Use a plant-based butter and substitute milk with almond, soy, or oat milk. The texture may vary slightly, but they’ll still be delicious.
How long do Nun’s Puffs keep fresh?
Enjoy them fresh the day they are made for the best texture. Stored properly, they stay tasty for up to two days but are best reheated gently for optimal enjoyment.
Final Thoughts
I can’t recommend this Nun’s Puffs Recipe enough if you’re looking for a simple yet show-stopping dish that feels like a little bit of magic on your plate. Whether you’re serving it to friends and family or enjoying it as a cozy solo treat, these puffs never fail to bring joy. Give this recipe a try—you’ll find yourself baking them again and again!
Print
Nun’s Puffs Recipe
- Prep Time: 10 minutes
- Cook Time: 30 minutes
- Total Time: 40 minutes
- Yield: 12 servings
- Category: Dessert
- Method: Baking
- Cuisine: American
Description
Nun’s Puffs are light, airy baked pastries made from a simple choux-like dough. These golden, puffed treats are slightly sweetened and served warm with honey, whipped cream, or fresh fruit, making them a delightful breakfast or dessert option.
Ingredients
For the Dough
- 1 stick butter (½ cup)
- 1 cup milk
- ¾ cup all-purpose flour
- 4 eggs
- ½–1 Tablespoon sugar (optional)
For Serving
- Sugar for sprinkling
- Honey for serving
- Whipped cream (optional)
- Fresh fruit (optional)
Instructions
- Preheat and Prepare Pan: Preheat your oven to 375°F (190°C) and thoroughly grease a muffin pan to prevent sticking.
- Melt Butter and Heat Milk: In a saucepan over low heat, melt the butter, then add the milk and bring the mixture to a low boil.
- Add Flour: Quickly add the flour all at once, stirring vigorously until the dough forms a smooth ball and pulls away from the sides of the pan.
- Cool Dough: Let the dough cool for about 5 minutes to prevent the eggs from cooking when added.
- Incorporate Eggs: Add the eggs one at a time, mixing thoroughly after each addition until the dough becomes smooth and shiny.
- Fill Muffin Cups: Divide the dough evenly among the prepared muffin cups. Sprinkle the tops with sugar if using.
- Bake: Bake in the preheated oven for 30 minutes or until the puffs are golden brown and have puffed up beautifully.
- Serve: Serve the Nun’s Puffs warm with honey drizzled on top, alongside whipped cream or fresh fruit as desired.
Notes
- For a less sweet version, omit the optional added sugar in the dough and topping.
- Ensure the dough is cooled before adding eggs to avoid scrambling them.
- Use fresh eggs for best texture and rise.
- Serve immediately for maximum puffiness; they may deflate as they cool.
- Variations can include adding vanilla extract or cinnamon to the dough for extra flavor.
