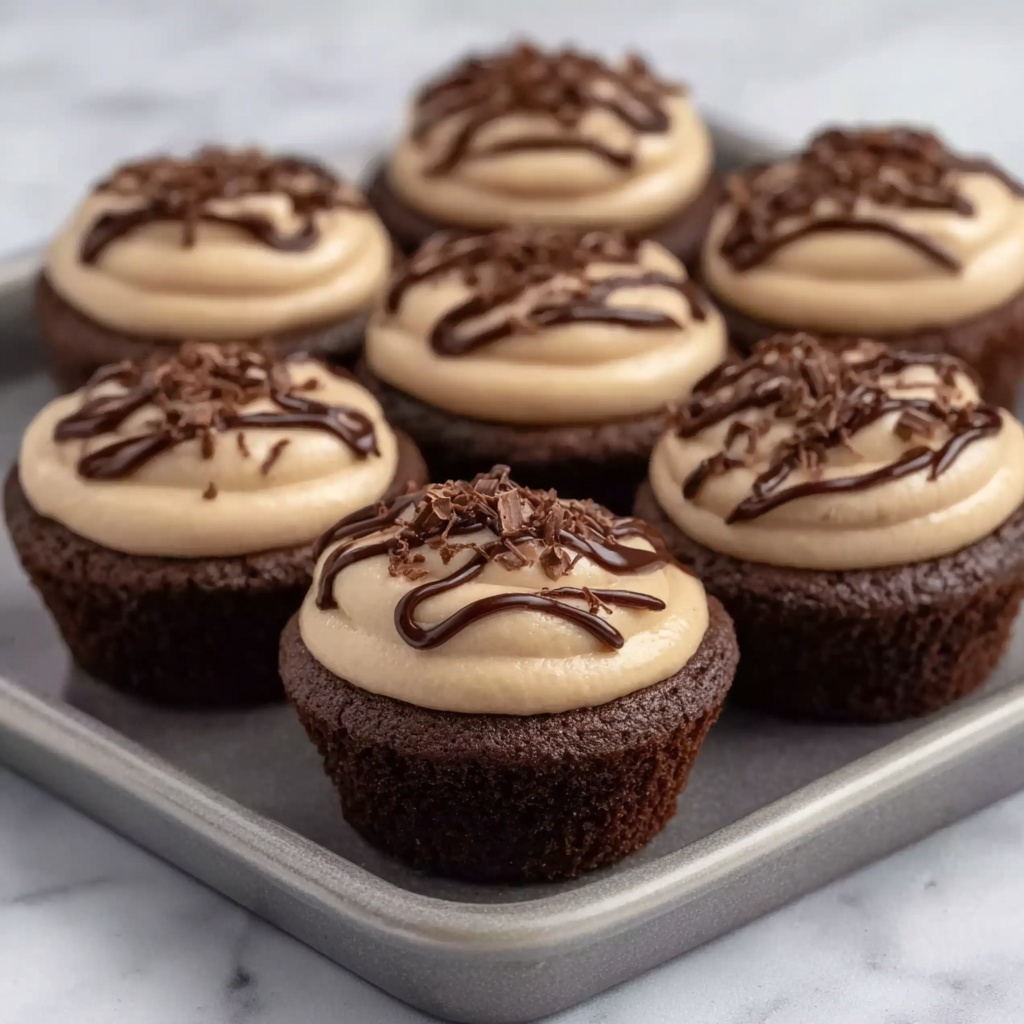
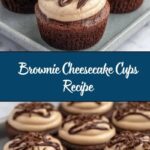
If you have a soft spot for both rich, fudgy brownies and creamy, dreamy cheesecake, then this Brownie Cheesecake Cups Recipe will steal your heart instantly. Imagine the perfect harmony of dense chocolate brownie bases topped with velvety cheesecake layers, all baked into adorable individual servings that are as fun to eat as they are to make. This dessert is indulgent yet approachable, making it a go-to for impressing guests or treating yourself to a special sweet moment anytime. Ready to dive into a truly irresistible marriage of two classic desserts? Let’s get started!
Ingredients You’ll Need
All you need for these Brownie Cheesecake Cups Recipe treats are simple pantry staples and a few fresh ingredients, each chosen to create the ideal balance of flavor, texture, and that unmistakable chocolate-cheesecake magic.
- Butter (1/2 cup, melted): Adds richness and helps create that fudgy brownie texture.
- Sugar (1 cup plus 1/3 cup): Sweetens both the brownie and cheesecake layers perfectly.
- Large eggs (3 total): Provide structure and moisture throughout the recipe.
- Vanilla extract (2 teaspoons): Gives depth of flavor and enhances sweetness.
- All-purpose flour (3/4 cup): The backbone of the brownie base; can be substituted for almond or gluten-free flour as needed.
- Unsweetened cocoa powder (1/3 cup): Infuses that unmistakable chocolate intensity.
- Chocolate chips or chunks (1/2 cup, optional): For those who love added melty pockets of chocolate.
- Cream cheese (8 oz, softened): The star ingredient for the luscious cheesecake layer.
- Sour cream or heavy cream (2 tablespoons, optional): Adds creaminess that helps the cheesecake layer stay tender.
- Chopped walnuts or pecans: For texture and toasty flavor contrasts.
- Fresh raspberry or strawberry puree: An optional fruity kick that brightens the dessert.
- Salted caramel sauce (store-bought or homemade): A decadent finishing touch that pairs perfectly with chocolate and cream cheese.
- Garnishes (fresh berries, powdered sugar, chocolate or caramel drizzle, crushed nuts): To elevate the presentation and taste.
How to Make Brownie Cheesecake Cups Recipe
Step 1: Prepare the brownie batter
Start by preheating your oven to 325°F (160°C). In a large bowl, cream together the melted butter and sugar until the mixture is smooth and glossy. Beat in the eggs one at a time to build a silky batter, then stir in the vanilla extract for warmth. Next, sift your flour and cocoa powder together to ensure there are no lumps, then gently fold these dry ingredients into your wet mixture just until combined. If you’re feeling indulgent, fold in chocolate chips to create pockets of gooey chocolate in every bite. This brownie batter lays the robust foundation for your dessert cups.
Step 2: Make the cheesecake layer
While the brownie batter rests, whip up the cheesecake filling. In a separate bowl, beat the cream cheese until it’s smooth and fluffy — this step is key to avoiding any lumps that can mar the creamy texture. Add sugar, egg, and vanilla extract, continuing to mix until fully combined and velvety. For extra silkiness, fold in sour cream or heavy cream; this optional addition keeps the cheesecake moist and slightly tangy, balancing the sweetness beautifully. Your cheesecake layer is what transforms these cups into a gourmet treat.
Step 3: Assemble the brownie cheesecake cups
Line a muffin tin with cupcake liners or grease it well to prevent sticking. Spoon about two tablespoons of brownie batter into each cup, creating an even base. Then, layer a similar amount of cheesecake filling on top. For a stunning visual and delightful texture contrast, gently swirl the two layers together using a toothpick or skewer—this little artistic touch ensures every bite has that perfect marbled combination. This is where the magic of the Brownie Cheesecake Cups Recipe really comes alive!
Step 4: Bake and chill
Bake your assembled cups in the preheated oven for 20 to 25 minutes. What you want is a cheesecake top that’s set but retains a slight jiggle—overbaking is the enemy of creamy cheesecake! Once out of the oven, allow the cups to cool completely in the pan, then chill them in the refrigerator for at least two hours. This cooling period lets the layers firm up, melding the luscious confection into easy-to-enjoy individual treats.
Step 5: Garnish and serve
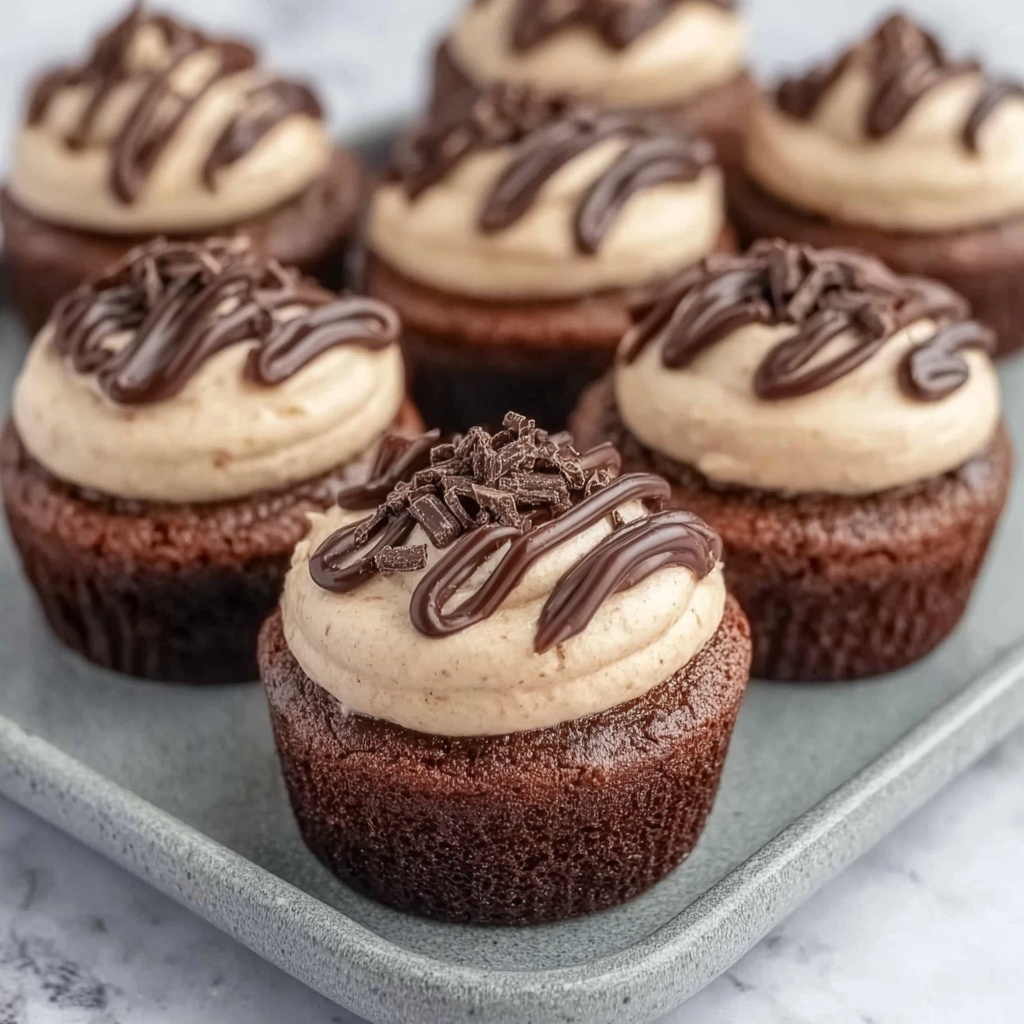
Carefully remove the cupcake liners (if you used them) before decorating. This step transforms these cups from delicious to downright irresistible. Garnish as you like with fresh berries, a dusting of powdered sugar, or drizzles of chocolate or salted caramel sauce. Sprinkle some crushed nuts on top for crunch and an extra layer of flavor. Now, your Brownie Cheesecake Cups Recipe is ready to wow anyone lucky enough to try them!
How to Serve Brownie Cheesecake Cups Recipe

Garnishes
The right garnish can elevate these cups from lovely to legendary. Fresh berries bring a bright, tart contrast that cuts through the richness and adds a pop of color. A light dusting of powdered sugar adds a delicate sweetness and an elegant finish. For true indulgence, drizzle with chocolate or salted caramel sauce—each bite becomes a celebration of flavors. Don’t forget crushed nuts for a tasty crunch that also looks spectacular!
Side Dishes
Serve these delightful cups alongside a scoop of vanilla ice cream or a dollop of freshly whipped cream to complement their dense texture and creamy topping. A small fruit salad or a simple espresso adds a refreshing or bold note, rounding out the dessert experience perfectly. Whether it’s a cozy night in or a festive occasion, these additions never disappoint.
Creative Ways to Present
Get creative with presentation by serving your Brownie Cheesecake Cups Recipe in clear mini mason jars for a rustic look or on a beautiful dessert platter with labels describing each garnish option. For parties, arrange them on skewers alternating with fresh berries for a playful and portable treat. You can also pipe the cheesecake layer for a more elegant, uniform appearance before baking. Presentation is half the fun with these charming desserts!
Make Ahead and Storage
Storing Leftovers
Once baked and chilled, your brownie cheesecake cups store beautifully in the refrigerator. Place them in an airtight container or cover the muffin tin tightly with plastic wrap. They’ll stay fresh and delicious for up to 4 days, giving you plenty of time to enjoy their indulgence without rushing.
Freezing
If you want to keep these treats longer, they freeze well. Remove from liners and wrap each cup tightly in plastic wrap and then foil to prevent freezer burn. Store in a zip-top freezer bag or container for up to 3 months. Thaw them in the refrigerator overnight before serving to maintain their perfect texture.
Reheating
Reheat your brownie cheesecake cups gently by microwaving them for about 15 seconds to bring back that freshly baked warmth—just be careful not to overheat, or the cheesecake may separate. Alternatively, enjoy them straight from the fridge for a refreshing, creamy dessert experience.
FAQs
Can I make these Brownie Cheesecake Cups Recipe gluten-free?
Absolutely! Just swap the all-purpose flour for an equal amount of almond flour or a gluten-free baking mix, and you’ll still get that fudgy brownie texture without gluten. The rest of the ingredients remain the same.
Can I use a dairy-free cream cheese in this recipe?
Yes, plant-based cream cheese works wonderfully for a vegan or dairy-free version. Make sure it’s softened before mixing to achieve the creamiest cheesecake layer possible.
Is it necessary to chill the cups for two hours?
Chilling is key because it helps the cheesecake layer firm up so the cups hold their shape perfectly when served. If you can’t wait that long, at least 1 hour in the fridge will still give good results.
What’s the best way to prevent the cheesecake layer from cracking?
Baking at a gentle temperature (325°F) and avoiding overbaking are crucial. The cheesecake should still jiggle slightly when you take it out of the oven; it will set fully while cooling without cracking.
Can I double the recipe?
Yes! This recipe scales well—just be sure to use multiple muffin tins or bake in batches so the cups bake evenly. The timing remains about the same, but keep an eye on the consistency of the cheesecake layer.
Final Thoughts
This Brownie Cheesecake Cups Recipe combines two beloved desserts into one glorious bite-sized experience, perfect for celebrations or whenever you want to treat yourself with something special. From the rich chocolate brownie base to the silky cheesecake top, every component has been crafted to delight and satisfy. Give it a whirl—it might just become your new favorite indulgence to share with friends and family.
Print
Brownie Cheesecake Cups Recipe
- Prep Time: 25 minutes
- Cook Time: 25 minutes
- Total Time: 2 hours 50 minutes
- Yield: 12 servings
- Category: Dessert
- Method: Baking
- Cuisine: American
- Diet: Gluten Free
Description
Deliciously rich Brownie Cheesecake Cups combining fudgy brownie bases with creamy cheesecake layers, baked to perfection and chilled for a decadent dessert ideal for parties or special occasions. Featuring optional mix-ins and customizable garnishes such as fresh berries, caramel sauce, and nuts, these individual servings capture the best of both worlds in a convenient, elegant presentation.
Ingredients
Brownie Batter
- 1/2 cup (115g) butter, melted
- 1 cup (200g) sugar
- 2 large eggs
- 1 teaspoon vanilla extract
- 3/4 cup (95g) all-purpose flour (or almond/gluten-free flour for gluten-free option)
- 1/3 cup (35g) unsweetened cocoa powder
- 1/2 cup chocolate chips or chunks (optional)
Cheesecake Layer
- 8 oz (225g) cream cheese, softened (regular, low-fat, or plant-based for vegan)
- 1/3 cup (67g) sugar
- 1 large egg
- 1 teaspoon vanilla extract
- 2 tablespoons sour cream or heavy cream (optional)
Garnishes (optional)
- Chopped walnuts or pecans
- Fresh raspberry or strawberry puree
- Homemade or store-bought salted caramel sauce
- Fresh berries
- Powdered sugar
- Chocolate or caramel drizzle
- Crushed nuts
Instructions
- Prepare the brownie batter: Preheat your oven to 325°F (160°C). In a mixing bowl, combine the melted butter and sugar, creaming them together until smooth. Beat in the eggs one at a time, ensuring each is fully incorporated before adding the next. Stir in the vanilla extract. Sift together the flour and cocoa powder, then gradually fold these dry ingredients into the wet mixture until just combined. If desired, fold in the chocolate chips or chunks for extra richness.
- Make the cheesecake layer: In a separate bowl, beat the cream cheese until smooth and fluffy. Add sugar, the egg, vanilla extract, and sour cream or heavy cream if using. Mix until well combined to create a creamy but thick mixture that will hold its shape atop the brownie base.
- Assemble the cups: Line a cupcake pan with muffin liners or grease the pan well. Spoon about two tablespoons of brownie batter into each cup to form the base. Carefully layer a similar amount of cheesecake mixture on top of each brownie portion. Optionally, use a toothpick or skewer to gently swirl the two layers together for a decorative marbled effect.
- Bake the cups: Place the pan in the preheated oven and bake for 20-25 minutes. The cheesecake layer should set but remain slightly jiggly in the center—avoid overbaking to prevent dryness. Once baked, allow the cups to cool completely in the pan.
- Chill the dessert: After cooling, transfer the cups to the refrigerator and chill for at least two hours to firm up the cheesecake layer and enhance the flavors.
- Serve and garnish: Remove the cups from the liners if used. Garnish as desired with fresh berries, a dusting of powdered sugar, drizzles of chocolate or caramel sauce, and crushed nuts. These cups can be enjoyed alone or paired with vanilla ice cream or whipped cream for an indulgent treat.
Notes
- Use gluten-free flour to make this recipe gluten-free.
- Substitute plant-based cream cheese and omit eggs for a vegan adaptation, though texture may vary.
- Ensure not to overbake to keep the cheesecake moist and creamy.
- Swirling the layers is optional but adds a beautiful marbled appearance.
- Chilling the cups is essential for the cheesecake layer to properly set.


