
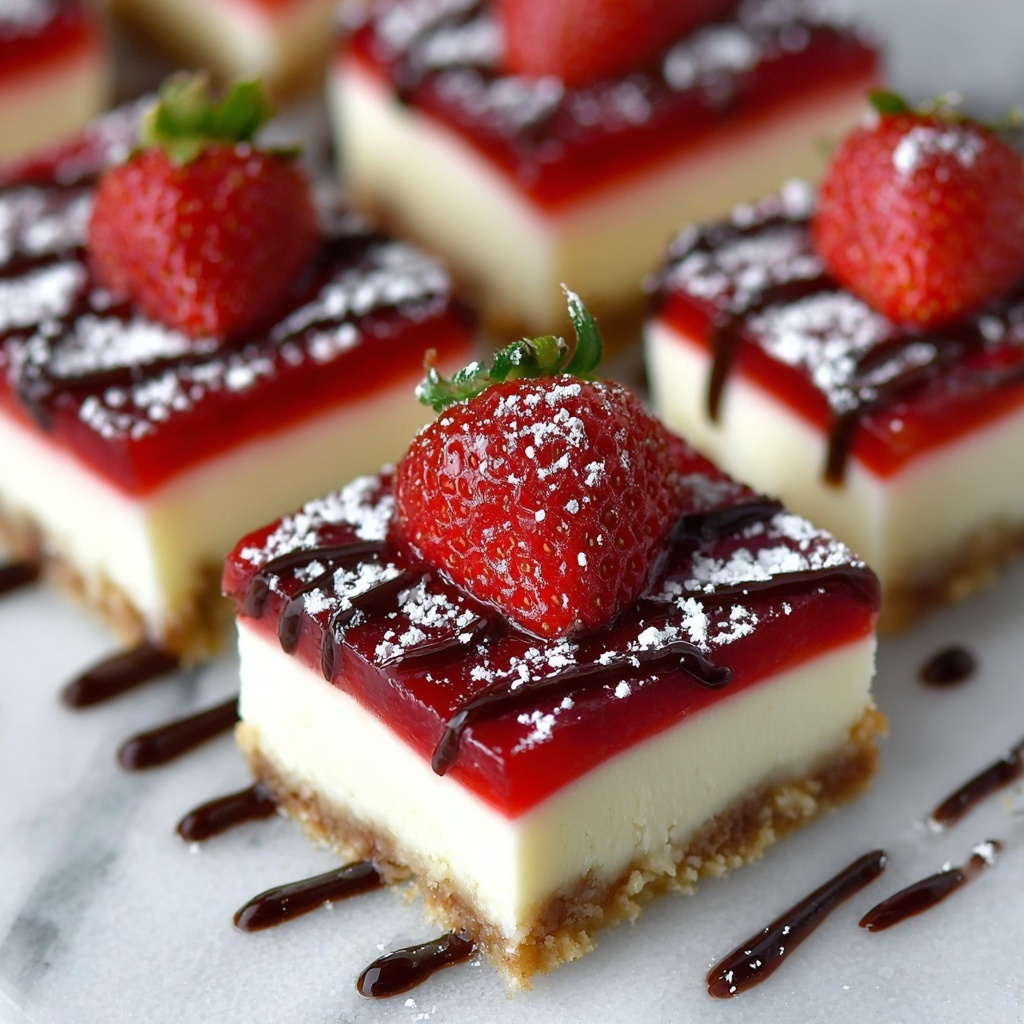
If you’ve been searching for a dessert that’s both irresistible and straightforward, look no further than this Philadelphia Cheesecake Bars Recipe. These bars come with a perfectly buttery graham cracker crust and a luxuriously creamy filling that melts in your mouth. Whether you’re treating yourself or impressing guests, this recipe hits the sweet spot between classic comfort and elegant dessert. Get ready to create something truly memorable, bite after delightful bite!
Ingredients You’ll Need
This Philadelphia Cheesecake Bars Recipe uses simple, everyday ingredients that come together to create magic. Each item plays a crucial role, lending the bars their rich texture, balanced sweetness, and that signature tangy cream cheese flavor you’ll love.
- Graham cracker crumbs (1 1/2 cups): The base for your crust, adding a perfect crunch and subtle sweetness.
- Granulated sugar (1/4 cup + 1 cup): Sweetens both the crust and filling for a well-rounded dessert.
- Unsalted butter, melted (6 tablespoons or 3 ounces): Binds the crust together and keeps it moist with buttery richness.
- Cream cheese, softened (24 ounces): The star ingredient delivering that luscious, creamy cheesecake texture.
- Vanilla extract (1 teaspoon): Adds warm, aromatic notes that enhance the overall flavor.
- Eggs (2 large): Provide structure and richness, ensuring the filling sets perfectly.
- Sour cream (1/4 cup): Adds smoothness and a slight tang that balances the sweetness.
- Fresh berries (strawberries, blueberries, raspberries): Optional, but highly recommended for a burst of color and freshness.
- Chocolate and caramel sauce: Fun toppings to take your bars to decadent new heights.
- Whipped cream: A light and fluffy finishing touch that pairs beautifully.
How to Make Philadelphia Cheesecake Bars Recipe
Step 1: Prepare the Perfect Crust
Start by preheating your oven to 350°F (175°C). Mix together the graham cracker crumbs, 1/4 cup granulated sugar, and melted butter in a bowl until everything is well combined. Press this mixture firmly into the bottom of a 9×13 inch baking pan. This sets the foundation for your cheesecake bars, so aim for an even, compact layer. Bake the crust for 8-10 minutes until it’s lightly golden and aromatic. Let the crust cool completely while you move on to the luscious filling.
Step 2: Craft the Creamy Cheesecake Filling
In a large bowl, beat the softened cream cheese until smooth and creamy. Gradually add the 1 cup of granulated sugar, beating well to fully incorporate. Stir in the vanilla extract and sour cream for added moisture and flavor. Next, add the eggs one at a time, mixing after each until just blended to avoid overbeating. This gentle folding keeps the filling silky without cracking as it bakes.
Step 3: Bake the Cheesecake Bars
Pour the cheesecake mixture over your cooled crust, smoothing the top evenly. Bake in your preheated oven for 25-30 minutes, watching for the edges to set firmly while the center remains slightly jiggly. Once baked, turn off the oven and leave the bars inside with the door slightly open for an hour — this slow cooling process helps prevent cracks and keeps the texture perfect. Afterward, allow the bars to cool fully at room temperature before refrigerating.
Step 4: Chill and Cut
Wrap the cheesecake bars with plastic wrap and refrigerate for at least 4 hours or preferably overnight. The chilling step is essential for the bars to set and develop their full flavor. When ready, slice them into squares or rectangles, and get ready to enjoy the creamy, dreamy results of your hard work!
How to Serve Philadelphia Cheesecake Bars Recipe

Garnishes
Garnishing your Philadelphia Cheesecake Bars enhances both flavor and presentation. Fresh berries like strawberries, blueberries, and raspberries bring beautiful colors and a bright, fruity contrast. A drizzle of chocolate or caramel sauce adds extra richness for an indulgent experience. Don’t forget a dollop of whipped cream to lighten every luscious bite.
Side Dishes
Philadelphia Cheesecake Bars are fantastic on their own, but pairing them with certain sides can elevate the experience. Consider serving with hot coffee or a glass of cold milk for classic comfort. A small bowl of fresh fruit salad or sorbet can add refreshing notes that balance the creamy density perfectly.
Creative Ways to Present
You can turn these cheesecake bars into an eye-catching dessert centerpiece by layering them in clear glass dishes or serving individual portions topped with a swirl of whipped cream and an artistic drizzle of sauces. For parties, consider skewering a bite with a berry on top for a fun, handheld treat that guests will love.
Make Ahead and Storage
Storing Leftovers
Philadelphia Cheesecake Bars keep beautifully in the refrigerator for up to 4 days. Be sure to store them covered tightly with plastic wrap or in an airtight container to maintain moisture and prevent the bars from absorbing other fridge odors.
Freezing
Want to save some for later? You can freeze the cheesecake bars either before or after cutting. Wrap each portion individually in plastic wrap and then place them in a freezer-safe container or bag. They’ll stay delicious for up to 2 months. When ready to enjoy, thaw overnight in the fridge for best texture.
Reheating
Since these bars are best served chilled, reheating is generally not recommended. If you prefer them slightly warm, let them sit at room temperature for a short while to take the chill off. This preserves the creamy texture without drying them out.
FAQs
Can I use low-fat cream cheese for this recipe?
While low-fat cream cheese can be used, it might affect the texture and richness of your cheesecake bars. Full-fat cream cheese yields a creamier, more luscious result that’s worth the indulgence.
Why is my cheesecake cracked on top?
Cracking often happens due to overbaking or sudden temperature changes. Following the step of cooling the bars slowly in the oven with the door ajar helps prevent this, as does mixing the batter gently and not overbeating the eggs.
Can I add flavors or mix-ins to the filling?
Absolutely! Vanilla is classic, but you can add lemon zest, chocolate chips, or swirl in fruit preserves to customize the bars. Just be mindful not to overpower the smooth cream cheese base.
Do I have to use graham cracker crust?
You don’t have to, but the graham cracker crust adds wonderful texture and flavor contrast. You can experiment with different crusts like crushed cookies or nuts if you want a twist.
How long should I chill the bars before serving?
For the best texture and flavor, chilling for at least 4 hours is ideal. Overnight is even better if you have the time, as it allows the cheesecake bars to fully set and develop their rich taste.
Final Thoughts
There’s something incredibly satisfying about making your own cheesecake bars, especially with a Philadelphia Cheesecake Bars Recipe that’s tried and true. This dessert is charmingly simple, yet so impressive on the plate and on the palate. Go ahead, treat yourself and those around you to a batch of these creamy, dreamy cheesecake bars—you’ll wonder why you didn’t make them sooner!
Print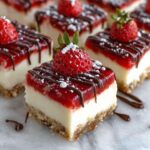
Philadelphia Cheesecake Bars Recipe
- Prep Time: 20 minutes
- Cook Time: 35 minutes
- Total Time: 5 hours including chilling
- Yield: 16 servings
- Category: Dessert
- Method: Baking
- Cuisine: American
Description
These Philadelphia Cheesecake Bars combine a buttery graham cracker crust with a smooth, creamy cream cheese filling baked to perfection. Topped with fresh berries, chocolate, caramel sauces, or whipped cream, they are an irresistible dessert ideal for gatherings or indulgent treats.
Ingredients
Crust
- 1 1/2 cups graham cracker crumbs
- 1/4 cup granulated sugar
- 6 tablespoons (3 ounces) unsalted butter, melted
Cheesecake Filling
- 24 ounces cream cheese, softened to room temperature
- 1 cup granulated sugar
- 1 teaspoon vanilla extract
- 2 large eggs
- 1/4 cup sour cream
Toppings (Optional)
- Fresh berries (strawberries, blueberries, raspberries)
- Chocolate sauce
- Caramel sauce
- Whipped cream
Instructions
- Preparing the Crust: Preheat your oven to 350°F (175°C). In a medium bowl, combine the graham cracker crumbs, granulated sugar, and melted butter until fully mixed. Press this mixture firmly and evenly into the bottom of a 9×13 inch baking pan to form the crust.
- Baking the Crust: Place the crust in the preheated oven and bake for 8-10 minutes, or until it turns lightly golden brown. Remove it from the oven and allow it to cool completely while preparing the filling.
- Making the Cheesecake Filling: In a large mixing bowl, beat the softened cream cheese with an electric mixer until smooth and creamy. Gradually add the granulated sugar, continuing to beat until well combined. Then, add vanilla extract and sour cream and mix until just combined. Add the eggs one at a time, beating after each until fully incorporated without overmixing.
- Baking the Cheesecake Bars: Pour the cheesecake filling evenly over the cooled graham cracker crust. Bake in the preheated oven for 25-30 minutes, or until the edges are set and the center is slightly jiggly but not liquid. Once baked, turn off the oven and let the cheesecake bars cool inside with the oven door slightly ajar for 1 hour to prevent cracking.
- Cooling and Refrigerating: After the hour, remove the cheesecake bars from the oven and allow them to cool fully at room temperature. Cover the pan tightly with plastic wrap and refrigerate for at least 4 hours, preferably overnight, to allow the cheesecake to set firmly and develop its full flavor.
- Cutting and Serving: Once chilled and set, cut the cheesecake bars into squares or rectangles. Serve plain or garnish with fresh berries, chocolate or caramel sauce, and whipped cream as desired for a delicious presentation.
Notes
- Ensure cream cheese is fully softened to room temperature for smooth batter and to avoid lumps.
- Do not overbeat the eggs to prevent cracking and maintain creamy texture.
- Cooling the cheesecake bars slowly in the oven helps avoid cracks on the surface.
- Refrigeration time is crucial for the best texture and flavor; avoid skipping it.
- Use a sharp knife dipped in hot water and wiped dry for clean cuts.

