
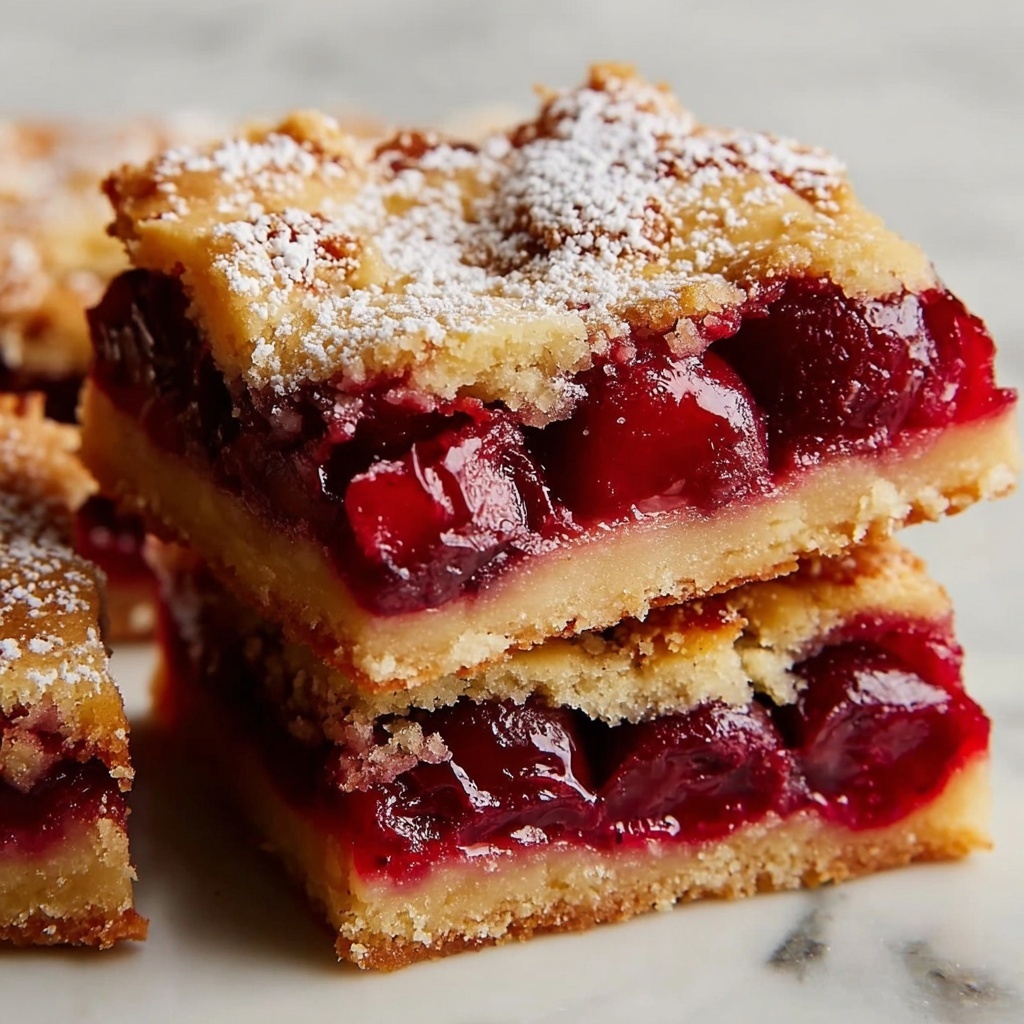
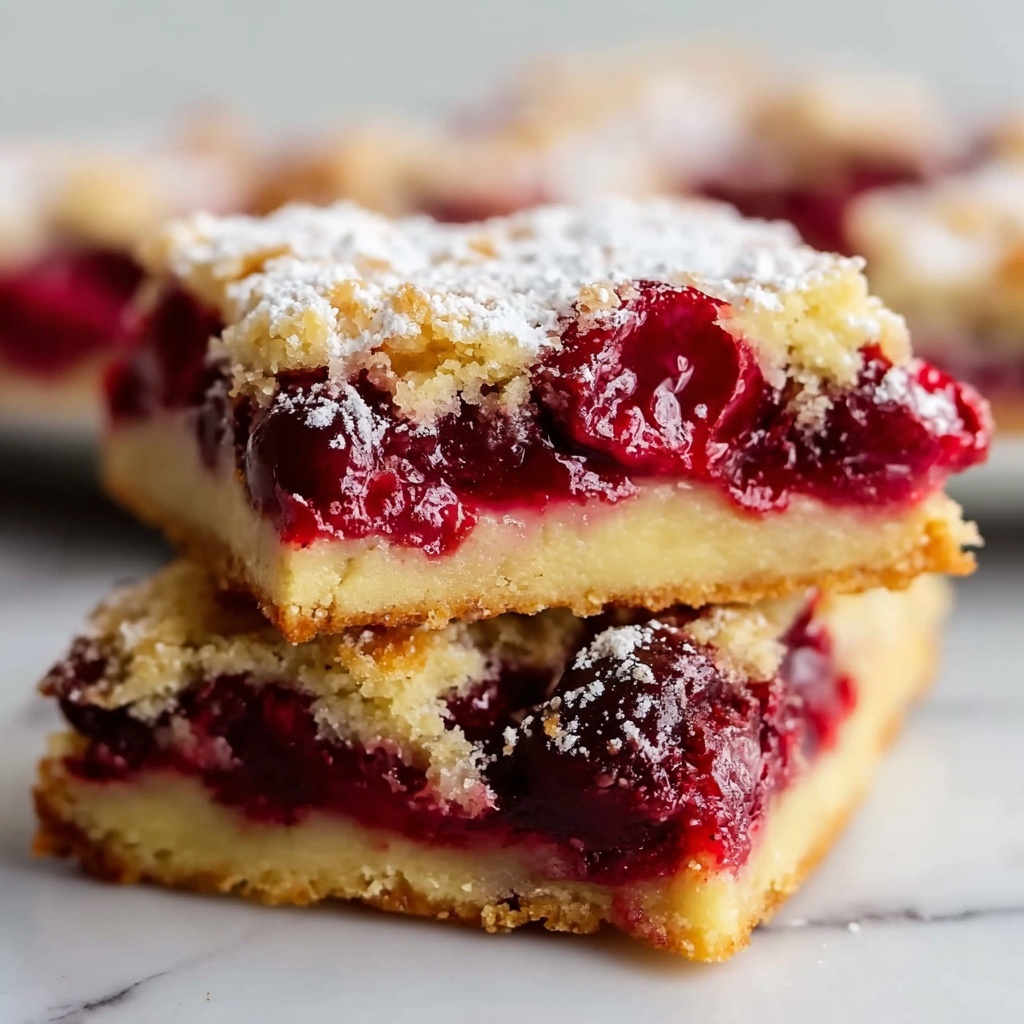
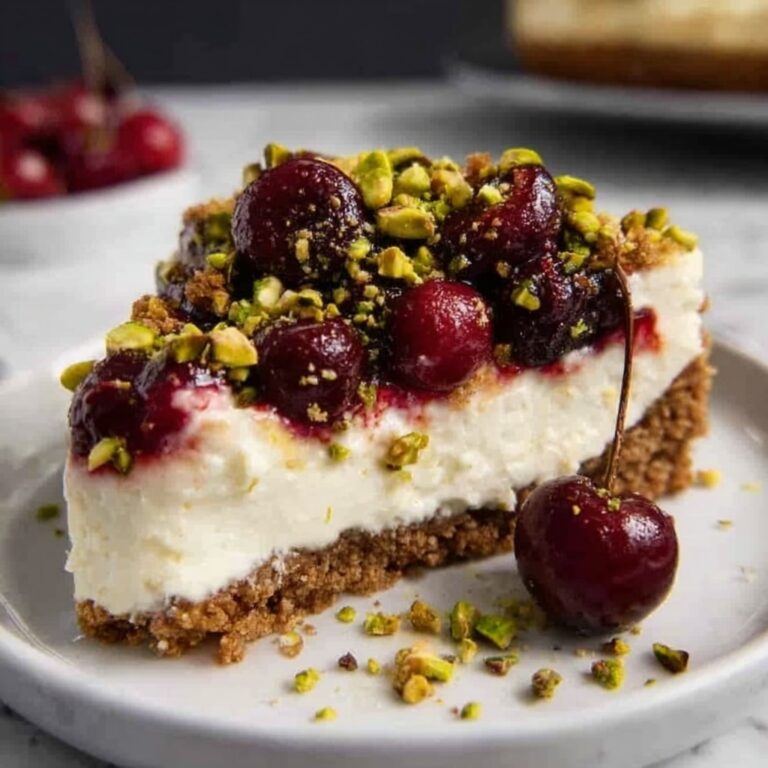
Nothing compares to the joyful burst of tart cherries combined with a buttery, tender crust in this delightful Cherry Pie Bars Recipe. This treat takes all the charm of a classic cherry pie and transforms it into easy-to-serve bars that are perfect for sharing, snacking, or impressing guests. Whether you’re an experienced baker or just looking to whip up a crowd-pleasing dessert, these bars offer a beautiful balance of sweet and tangy flavors with a satisfying texture that’s simply irresistible.
Ingredients You’ll Need
The charm of this Cherry Pie Bars Recipe lies in its simple yet essential ingredients. Each component plays a crucial role, from the creamy butter creating a tender crust to the luscious cherry pie filling adding vibrant color and flavor.
- Unsalted butter (1 cup, softened): Adds richness and helps create a soft, buttery crust for the bars.
- Granulated sugar (1 1/2 cups): Sweetens the dough, balancing the tartness of the cherries perfectly.
- Large eggs (4, room temperature): Bind the ingredients and add structure while keeping the bars moist.
- Vanilla extract (1 teaspoon): Enhances the overall flavor with a warm, comforting aroma.
- All-purpose flour (3 cups): Forms the sturdy base and crumbly texture essential for these bars.
- Baking powder (1 teaspoon): Gives a slight lift to the dough, preventing it from being too dense.
- Salt (1/2 teaspoon): Balances sweetness and highlights the flavors.
- Cherry pie filling (1 can, 21 ounces): The star ingredient offering a juicy, vibrant fruit layer bursting with cherry goodness.
- Powdered sugar (1/2 cup): Used for the glaze that adds a delicate sweetness and pretty finish.
- Milk or lemon juice (1 to 2 tablespoons): Mixed into the powdered sugar glaze for smoothness and a touch of tanginess if lemon juice is chosen.
How to Make Cherry Pie Bars Recipe
Step 1: Prepare Your Baking Pan and Oven
Start by preheating your oven to 350°F and greasing a 9×13-inch baking pan. Getting your baking vessel ready before you start mixing saves time and ensures your bars don’t stick, making cleanup easier.
Step 2: Cream the Butter and Sugar
In a large bowl, beat the softened butter and granulated sugar together until light and fluffy. This step is key to introducing air into the mixture, which helps give the bars a tender, melt-in-your-mouth texture.
Step 3: Incorporate Eggs and Vanilla
Beat in the eggs one at a time, making sure each is fully incorporated before adding the next. Then stir in the vanilla extract to infuse the dough with a cozy aromatic note.
Step 4: Mix Dry Ingredients
In a separate bowl, whisk together the flour, baking powder, and salt. This ensures the leavening agent is evenly distributed, so your bars bake uniformly.
Step 5: Combine Wet and Dry Ingredients
Gradually add the dry ingredients to the wet mixture, stirring gently until a soft dough forms. Be careful not to overmix – you want just enough to combine everything smoothly.
Step 6: Assemble the Bars
Spread about two-thirds of the dough evenly in the prepared pan. Then spoon the cherry pie filling over that base layer, spreading it evenly to cover. Finally, drop small spoonfuls of the remaining dough on top of the cherries to create a rustic, inviting look.
Step 7: Bake to Perfection
Bake in the preheated oven for 35 to 40 minutes, or until the top is lightly golden and set. The aroma filling your kitchen at this stage is simply heavenly!
Step 8: Cool and Glaze
Allow the bars to cool completely in the pan. Once cooled, whisk powdered sugar with milk or lemon juice to make a smooth glaze, then drizzle it artistically over the top before slicing into bars.
How to Serve Cherry Pie Bars Recipe
Garnishes
Enhance these bars by sprinkling a little extra powdered sugar for a delicate snowy effect, or add a few fresh cherries on top for an eye-catching pop of color. A dollop of whipped cream or a scoop of vanilla ice cream makes a delightful companion to these fruity bars.
Side Dishes
These cherry bars pair beautifully with a light cup of coffee or tea, making them perfect for a brunch spread or afternoon snack. For a more indulgent approach, serve alongside a scoop of creamy vanilla or almond-flavored ice cream, which complements the cherry filling wonderfully.
Creative Ways to Present
Try cutting these bars into bite-sized squares for a party platter or arranging them on a rustic wooden board for a cozy picnic vibe. For a festive touch, drizzle the glaze in fun patterns or dust with cinnamon for an unexpected twist.
Make Ahead and Storage
Storing Leftovers
Once cooled and glazed, store your Cherry Pie Bars Recipe in an airtight container at room temperature for up to 2 days. This keeps them soft and fresh, making for easy grab-and-go treats.
Freezing
If you want to save them for longer, these bars freeze wonderfully. Wrap them tightly in plastic wrap and place in a freezer-safe container. They’ll keep well for up to 3 months and thaw quickly when ready to enjoy.
Reheating
Reheat individual bars briefly in the microwave for about 10-15 seconds to bring back their soft texture and warm cherry filling. Avoid reheating too long, or they can dry out. Alternatively, a short stint in a low-heat oven revives their fresh-baked appeal.
FAQs
Can I use fresh cherries instead of canned pie filling?
Fresh cherries are a lovely alternative but require extra preparation like pitting and cooking with sugar and cornstarch to thicken. The canned pie filling simplifies the process and ensures consistent texture and sweetness.
What can I substitute for unsalted butter?
You can use salted butter but reduce or omit the added salt in the recipe. For a dairy-free version, try a solid vegetable shortening or vegan butter substitute, though texture and flavor might vary slightly.
How long do Cherry Pie Bars stay fresh?
Stored properly at room temperature, these bars stay fresh and tasty for up to 2 days. Refrigeration extends their life to about 5 days, but bring them to room temperature before serving for the best flavor.
Is there a gluten-free option for this recipe?
Yes! Substitute the all-purpose flour with a gluten-free baking blend that measures cup-for-cup. Make sure yours contains xanthan gum or add it separately to maintain the structure of the bars.
Can I add almond extract to this recipe?
Absolutely! Adding a pinch of almond extract to the dough elevates the flavor, pairing beautifully with cherries and giving the bars a delightful, nutty aroma.
Final Thoughts
If you’re craving a dessert that feels like a warm hug, this Cherry Pie Bars Recipe is your new best friend in the kitchen. Easy to make, stunning to serve, and bursting with luscious cherry flavor, these bars are destined to become a favorite for gatherings or cozy nights in. I can’t wait for you to try them and fall in love just as I did!
Print
Cherry Pie Bars Recipe
- Prep Time: 15 minutes
- Cook Time: 40 minutes
- Total Time: 55 minutes
- Yield: 16 bars
- Category: Dessert
- Method: Baking
- Cuisine: American
- Diet: Vegetarian
Description
Delight in these Cherry Pie Bars, a delicious twist on classic cherry pie with a buttery crust and luscious cherry pie filling. Perfectly baked and topped with a sweet glaze, these bars offer a simple yet irresistible dessert that’s easy to prepare and sure to satisfy your sweet tooth.
Ingredients
Dough Ingredients
- 1 cup unsalted butter, softened
- 1 1/2 cups granulated sugar
- 4 large eggs, room temperature
- 1 teaspoon vanilla extract
- 3 cups all-purpose flour
- 1 teaspoon baking powder
- 1/2 teaspoon salt
Filling
- 1 can (21 ounces) cherry pie filling
Glaze
- 1/2 cup powdered sugar
- 1 to 2 tablespoons milk or lemon juice
Instructions
- Preheat and Prepare Pan: Preheat your oven to 350°F (175°C) and grease a 9×13-inch baking pan to prevent sticking.
- Cream Butter and Sugar: In a large bowl, cream together the softened unsalted butter and granulated sugar until the mixture is light and fluffy, which helps create a tender crumb.
- Mix Eggs and Vanilla: Beat in the eggs one at a time, ensuring each is fully incorporated, then add the vanilla extract for aroma and flavor.
- Combine Dry Ingredients: In a separate bowl, whisk together all-purpose flour, baking powder, and salt to evenly distribute the leavening agents and seasoning.
- Form Dough: Gradually mix the dry ingredients into the wet ingredients until a soft dough forms, taking care not to overmix to maintain tenderness.
- Layer Dough and Filling: Spread about two-thirds of the dough evenly into the prepared pan as the base layer. Spoon the cherry pie filling evenly over this dough layer, then drop small spoonfuls of the remaining dough over the cherry filling to create a crumbly topping.
- Bake: Place the pan in the oven and bake for 35 to 40 minutes, or until the bars turn lightly golden and set firmly.
- Cool: Remove from the oven and allow the bars to cool completely in the pan to set the layers properly.
- Prepare Glaze: In a small bowl, whisk together the powdered sugar with the milk or lemon juice until smooth and drizzle this glaze evenly over the cooled bars for an added sweet touch.
- Serve: Once glazed, slice the bars into 16 evenly sized pieces and serve. Enjoy your cherry pie bars as a delightful dessert or snack!
Notes
- For extra flavor, add a pinch of almond extract to the dough mixture.
- Store bars covered at room temperature for up to 2 days or refrigerate for longer freshness.

