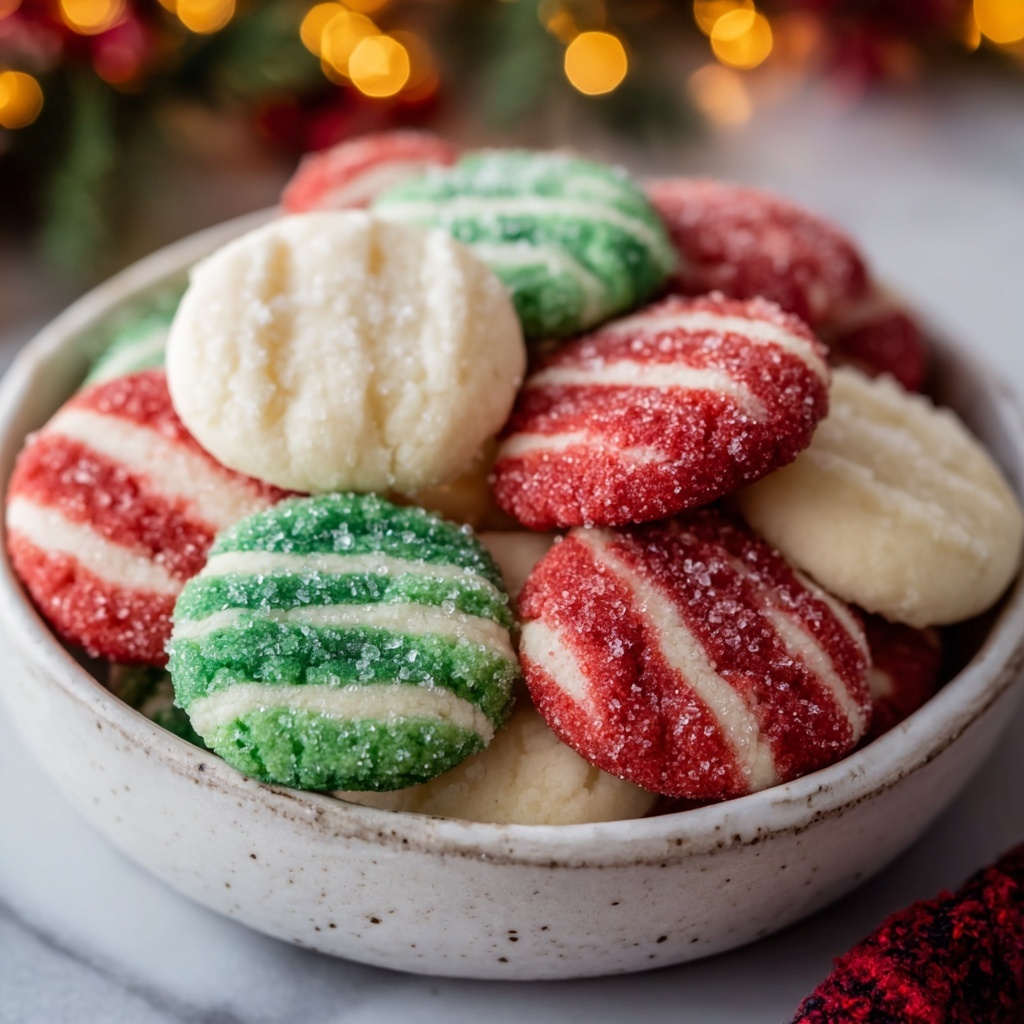
If you’re on the hunt for a festive, homemade treat that embodies the joyful spirit of the holidays, the Christmas Mints Recipe is your new go-to delight. These colorful, minty discs deliver the perfect balance of creamy sweetness and refreshing peppermint without any baking fuss. Each bite offers a nostalgic crunch with a soft center that melts in your mouth, making them a charming addition to any holiday gathering or a heartfelt gift from your kitchen to loved ones. Plus, with just a handful of simple ingredients, you can whip up a batch of these cheerful mints and impress everyone with your candy-making skills.
Ingredients You’ll Need
Creating these delightful Christmas mints is easier than you think, thanks to a simple list of ingredients that each bring something special to the table. From creamy texture to vibrant color and refreshing peppermint flavor, these essentials are key to achieving true holiday magic.
- Granulated sugar: Used for coating the mints, adding crunch and sparkle.
- Cream cheese (room temperature): Gives the mints a smooth, rich base that’s subtly tangy.
- Unsalted butter (room temperature): Adds creaminess and helps bind the mints together.
- Light/clear corn syrup: Keeps the texture soft and chewable, not crumbly.
- Peppermint extract: The star flavor that makes these mints unmistakably festive.
- Powdered sugar (4 1/4 – 5 cups, divided): Sweetens and thickens the dough for the perfect consistency.
- Green liquid food coloring: For that vibrant Christmas green color.
- Red liquid food coloring: Adds festive red hues to brighten your batch.
How to Make Christmas Mints Recipe
Step 1: Prepare Your Workspace
Start by lining a large rimmed baking tray with parchment paper—this will be where your mints dry and set. Keep a small bowl of granulated sugar nearby for coating later, making the process smoother and more organized.
Step 2: Mix the Base Ingredients
In a large bowl, use a handheld mixer on low speed to combine the cream cheese, unsalted butter, corn syrup, and peppermint extract. Beat for about one minute until the mixture is perfectly smooth and creamy. This creamy base is what gives your Christmas mints their signature melt-in-your-mouth texture.
Step 3: Incorporate the Powdered Sugar
Slowly add 4 1/4 cups of powdered sugar, half a cup at a time, while mixing on low speed. Once the dough thickens so much that the mixer can’t handle it, switch to a spatula or wooden spoon and finish mixing by hand. This step is crucial for achieving the right dough consistency that’s firm but pliable.
Step 4: Knead and Divide the Dough
Sprinkle powdered sugar on a clean surface and turn out the dough. Divide it evenly into three portions. This division lets you play with colors to celebrate the festive season.
Step 5: Add the Color
Create a shallow well in two of the dough balls and add red food coloring to one, green to the other, leaving the third plain white. Knead each dough ball thoroughly to distribute the color evenly. If the dough gets sticky from the food coloring, sprinkle in a little more powdered sugar gradually until it feels just right to handle.
Step 6: Roll into Ropes
Roll each colored dough ball into an 18-inch long rope, about an inch thick. This step helps in slicing the dough into bite-sized mints that are uniform in size and perfect for gift boxes or serving trays.
Step 7: Cut and Shape the Mints
Slice each rope into thick half-inch pieces. Roll each piece between your palms to form a small, smooth ball ready for coating.
Step 8: Coat with Sugar
Drop a few balls at a time into the granulated sugar and toss them gently to coat thoroughly. This sugar coating adds a delicate crunch and a beautiful sparkle that makes these mints look just as good as they taste.
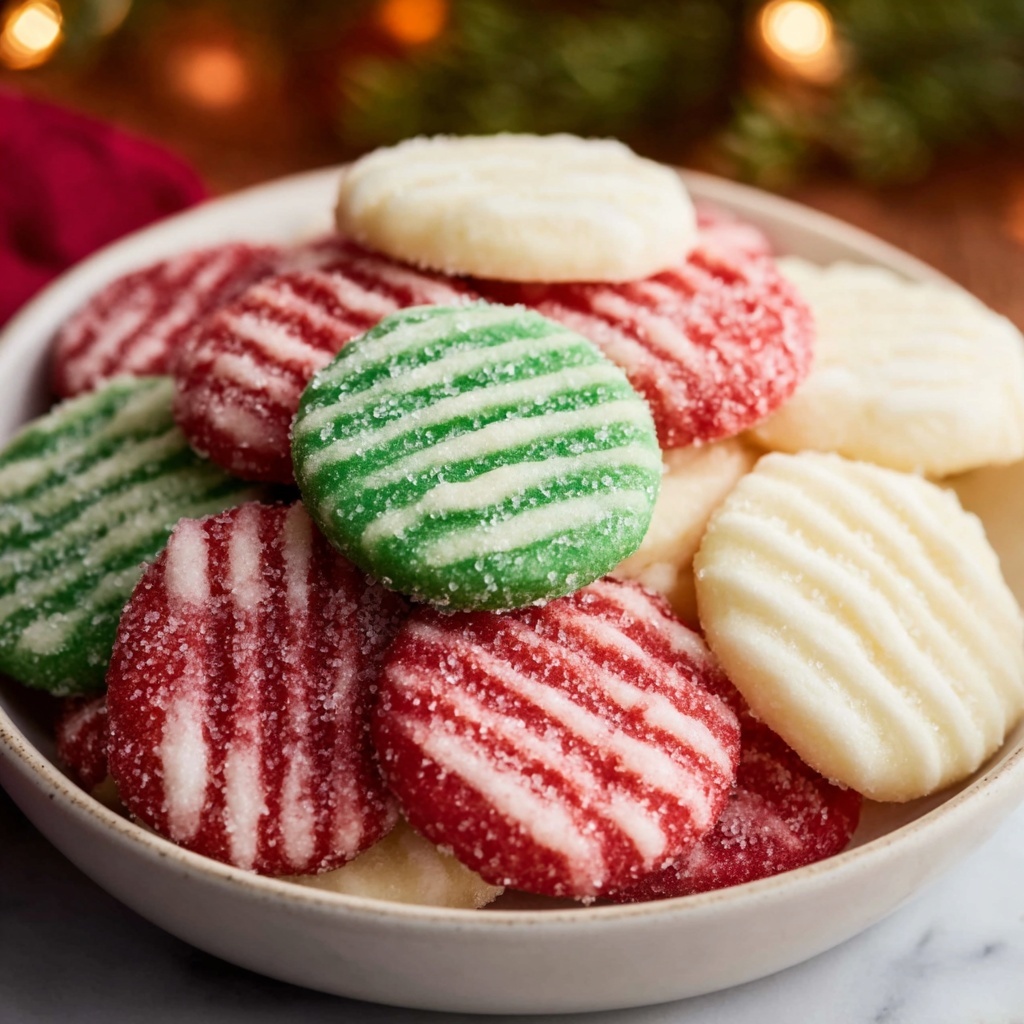
Step 9: Press and Pattern the Mints
Place the sugar-coated balls onto your parchment-lined tray. Using the tip of a fork, gently press each ball down to flatten it into a disc and create a charming striped pattern—adding a bit of elegance and holiday flair.
Step 10: Let the Mints Set
Allow the mints to rest at room temperature for up to 24 hours. This drying period is essential so they firm up nicely while maintaining their creamy interior, achieving that perfect crunch on the outside.
How to Serve Christmas Mints Recipe

Garnishes
To glam up your Christmas mints, consider adding a sprinkle of crushed candy canes or edible glitter right after the sugar coating step. This adds texture and a festive shimmer that will wow your guests at any holiday party.
Side Dishes
These mints pair beautifully with a classic cup of hot cocoa or freshly brewed peppermint tea, enhancing the minty flavor and offering a refreshing dessert contrast. Place them on a dessert platter alongside cookies and chocolates for a festive sweet spread.
Creative Ways to Present
Package your Christmas mints in clear cellophane bags tied with red and green ribbons for adorable stocking stuffers or party favors. Alternatively, arrange them in a holiday-themed tin or jar layered with red and green tissue paper for a charming gift presentation.
Make Ahead and Storage
Storing Leftovers
Keep your leftover Christmas mints fresh by storing them in an airtight container at room temperature. They will stay perfect for up to two weeks, making it easy to enjoy your candy throughout the holiday season without worrying about dryness or losing flavor.
Freezing
If you want to prepare your Christmas mints far in advance, freezing is a great option. Place the mints in a single layer on a baking sheet to freeze until firm, then transfer to a freezer-safe container or bag. When stored this way, they can last up to three months.
Reheating
Christmas mints are best enjoyed chilled or at room temperature and do not require reheating. Simply let any frozen mints thaw on the countertop before serving to maintain their perfect texture and flavor.
FAQs
Can I use peppermint oil instead of peppermint extract?
Yes, peppermint oil can be used but start with a very small amount since it is much stronger than extract. Adjust to taste carefully to avoid overpowering the mints.
Why do I need to let the mints dry for 24 hours?
Allowing the mints to dry helps them firm up and develop a slight outer crunch while keeping the inside soft and creamy. Skipping this step may result in sticky or overly soft candies.
Can I make the dough without food coloring?
Absolutely! The mints will still taste delicious without the festive colors, resembling classic white peppermint candies perfect for any occasion.
What if my dough is too sticky or too dry?
Add more powdered sugar a tablespoon at a time if the dough is sticky, or a tiny bit of corn syrup if it feels too dry. The right dough texture should be firm enough to roll but still pliable.
Is this recipe suitable for large holiday parties?
Yes! This Christmas Mints Recipe yields about 100 servings, making it superb for sharing at big gatherings or creating personalized gift boxes for many friends and family members.
Final Thoughts
Now that you have this wonderfully festive Christmas Mints Recipe in your arsenal, you’re all set to bring extra joy and sweetness to your holiday celebrations. Easy to make, delightfully colorful, and utterly delicious, these mints will quickly become a cherished tradition in your kitchen. Give them a try and watch as smiles light up the room with every refreshing bite!
Print
Christmas Mints Recipe
- Prep Time: 20 minutes
- Cook Time: 0 minutes
- Total Time: 24 hours 20 minutes
- Yield: 100 servings
- Category: Candy
- Method: No-Cook
- Cuisine: American
Description
These festive Christmas Mints are a soft, creamy, and flavorful holiday treat that combines a smooth cream cheese base with peppermint extract, colored vibrantly in red, green, and white. Perfect for gifting or enjoying at holiday gatherings, these bite-sized candies have a delicious crumbly texture and a refreshing mint flavor.
Ingredients
Base Ingredients
- 1/3 cup granulated sugar
- 4 ounces cream cheese, room temperature
- 2 tablespoons unsalted butter, room temperature
- 2 tablespoons light/clear corn syrup (such as Karo)
- 1 teaspoon peppermint extract
Dry Ingredients
- 4 1/4 – 5 cups powdered sugar, divided
Coloring
- 6 drops green liquid food coloring
- 6 drops red liquid food coloring
Instructions
- Prepare the Workspace: Line a large rimmed baking tray with parchment paper and place the granulated sugar into a small bowl; set both aside to use later.
- Mix the Base Ingredients: In a large mixing bowl, use a handheld mixer on low speed to beat together the cream cheese, unsalted butter, corn syrup, and peppermint extract for about 1 minute or until smooth and combined.
- Incorporate the Powdered Sugar: Gradually add 4 1/4 cups of powdered sugar to the mixture, about 1/2 cup at a time, keeping the mixer on low. When the dough becomes too stiff to mix with the mixer, switch to using a spatula or wooden spoon to finish mixing by hand.
- Knead the Dough: Sprinkle a piece of parchment paper with 1/4 cup powdered sugar, turn the dough onto it, and divide into three equal parts.
- Color the Dough: Make a shallow well in two of the dough portions. Add red food coloring to one and green to the other, leaving the third portion white. Carefully knead each portion until color is evenly distributed. Add up to an additional 1/4 cup of powdered sugar if the dough becomes too sticky.
- Form the Ropes: Roll each dough ball into an 18-inch long rope about 1 inch thick.
- Slice and Shape the Mints: Cut the ropes into 1/2-inch slices and roll each slice between your palms to form small balls.
- Coat with Sugar: Toss 2-3 dough balls at a time into the bowl of granulated sugar to coat evenly. Place the coated balls onto the prepared baking tray.
- Press into Discs: Using the tip of a fork, gently press each dough ball to flatten into a disc, creating a striped pattern on top.
- Dry the Mints: Let the mints sit at room temperature on the tray for up to 24 hours to set and dry before serving.
Notes
- Make sure the cream cheese and butter are at room temperature for easier mixing and smoother dough.
- Add the powdered sugar gradually to avoid a dry or crumbly dough.
- If the dough becomes too sticky while coloring, add powdered sugar slowly until manageable.
- Letting the mints dry is essential to achieve the perfect texture and firmness.
- You can use gel food coloring as an alternative for more vibrant colors without adding extra moisture.


